
THE TEARING DOWN
AND REBUILDING
OF ZACHARYVILLE
By Earl Mullins
The original room of the D & EM Railroad has a railroad town named Zacharyville, a coal mine, two breweries, a farm, a lake with a recreation area, a deer sanctuary, a partially completed packing plant, a hobo campground, and two large railroad yards. This is all great, but one major drawback is a 12 foot crawl under one must maneuver through to view these scenes and to operate the railroad.
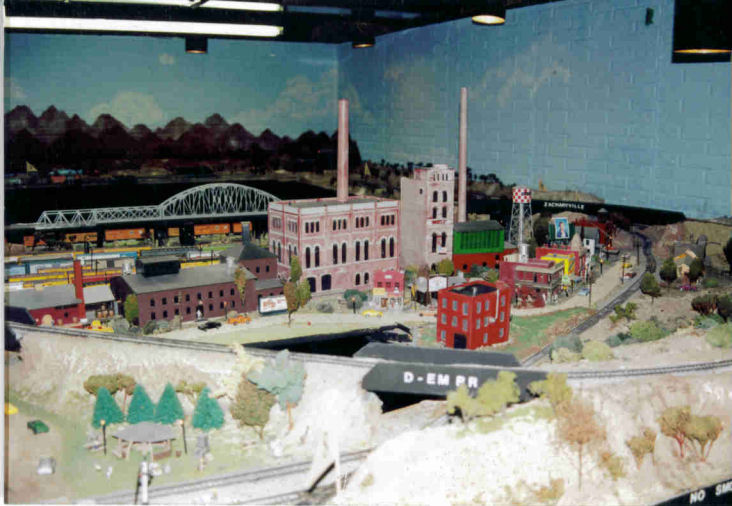
Photo #1 This is the town of Zacharyville as it looked on October 1, 2002
The seriousness of the drawback became apparent when the block track operation was converted to DCC, allowing the operator to move with his train. It is impossible to follow one&aposs train with the crawl under.
It is physically difficult to maneuver the crawl under, preventing some operators from operation opportunities in the whole room. (There seems to be two types of operators: one stands on the outside longingly looking in and hoping his train gets around the outer track without difficulty; and the other gets into the middle and stays for hours, switching and working in the yards.)
The change will create disadvantages, such as, decreased operation for a considerable time; destruction of a mostly completed, smooth-running layout; loss of major car storage in the yards; the need for a challenging track plan; and increased cost.
The challenge is to be positive about the change, recognizing there are other advantages besides easier access. A new design will provide a chance to try new layout and scenery techniques. Industries, as well as other functions, can be designed with operating sessions in mind. A facelift for Zacharyville will be good since currently much of it is not accessible or even very visible.
The change looks very reasonable on paper. It will be difficult to tear down this part of the layout because it has been like a good friend for 22 years. But Dianne and I have the energy and motivation to make the first cut, knowing the end results will be worth the change. Hopefully, some of you who have given thought to making changes to your railroad will be stimulated to do so after reading about our plans for tearing down and rebuilding Zacharyville.
I have always thought model railroading was a wonderful hobby. Even at the young age of seven years, I knew I liked trains. Getting an American Flyer New York Central train set at Christmas in 1953 gave me the start to having an hobby for life. I always knew that when I retired, much of my time would be spent in the basement building and operating model trains. Model railroading offers so many opportunities for one to express one's self in a creative manner, and there are numerous projects that a wait as one build one's pike.
This article is about a major project on the Dianne & Earl Mullins Railroad, officially named the D & EM RR. Dianne and I have spent 23 years building and operating the D & EM Railroad always using DC power. But using DCC allows us to be in control of the engine rather than the track which is an advantage during operating session. We ran into a major problem in the room in which the town of Zacharyville was located. Twenty years ago, the rule many model railroaders followed was to locate in the middle of the layout and let the trains run around the walls of the room while the operator controlled trains from a fixed control panel. Of course, to get to the middle of the layout, one built a "craw lunder". I not only built a crawl under; I built one 10 feet long in the original 14 feet by 20 feet room. My problem was that I wanted to follow the train, not crawl 10 feet under a table on my knees while the trains traveled unseen. Plus, as we get a little older (but wiser), and maybe somewhat heavier, crawling through a crawl under is hard work and we lose some interest in the operation. This article explains how we went about the tear down and the build up of Zacharyville.
The first thing we did was have club member and friend Steve Snook from Grand Island produce a 30 minute video of the D & EM Railroad. This video will allow us to look back over 20 years of model railroading and allow others to see the railroad as it was originally built and operated.
THE TEARDOWN: We started by removing all of the structures, figures, vehicles, trees, signs, telephone poles, and street and yard lights: basically, all of the items that could be boxed and used again.

Photo #2 November, 2002 old bench work being torn down.
The second step was the removal of the scenery made of paper mache applied over screen wire. This scenery was not going to be used again, so all of the mountains, hills, and valleys were broken apart and with the screen wire, placed in large plastic bags and thrown away. Dianne had built a wonderful scene featuring a small lake (the water does look real) with a person rowing a boat and swimmers playing on the sandy beach. This scene was saved to be built into our new scenery.
By this time the layout was starting to look pretty bare, but we were still able to run trains (remember there were four other rooms with scenery so train running was possible.
The third major step was to remove the track, turnouts and cork roadbed from the yards and sidings, leaving the mainline untouched so train running could still be done. The old track and turnouts were Atlas code 100 and all of it had been ballasted and weathered. Ballasting made it very difficult to reuse this track. In addition, the track spiked down for twenty years and the curves could not be flexed back to straight track. But the main reason for not reusing this track was that we wanted to start new with code 83 track and Peco turnouts. The wires feeding the track, all of the turnouts, the lights in buildings and the many street and yard lights were cut under the bench work by our grandchildren; they certainly had fun doing this. After the spikes were pulled, the track and cork roadbed were removed, and along with all of the wiring, discarded. The sub roadbed, made of wood, was also pulled and thrown away. This left only the mainline, but the trains were still running.
The fourth step was to tear down the bench work except for the part that supported the mainline track. The plans were to save as much of the wood as possible and reuse it to build the new bench work. Of course, drywall screws were not used twenty years ago, so many nails had to be pulled. The wood was stacked on the pool table in another room and any wood that was not reusable was discarded.
Finally, after four weeks, the only part of the layout in the Zacharyville room still standing was a single mainline track going around the outside of the room. This still gave us the opportunity to run trains through all five rooms. Then, on October 31, 2002, Dianne and I set up an operating session that would be the last one on the tracks of Zacharyville. My train that evening was a mixed freight with my favorite engine #3985 on the point. Dianne's mixed freight was headed by her favorite Black Widow F units. As the trains slowly moved out of the Tylerville Yard, one could hear the chuff, the bell and the deep whistle of #3985. The Black Widow F units, sounding the horn and bell and with the Mars light flashing and headlight shining brightly, slowly followed the train pulled by the huge Union Pacific steam engine. The trains traveled though Hutch Hill, Cornbuff Bend, Cramer Corner, Josie Juction and made their way towards Zacharyville. Both trains stopped at the lone station, gave a whistle goodbye, and slowly moved out of Zacharyville. The part of the D & EM RR in this room gave us a great twenty years of model railroading! The next morning I dismantled the remaining mainline track, roadbed and benchwork and left the room of Zacharyville empty.
THE REBUILD: There were five main reasons for rebuilding the Zacharyville room of the D & EM RR. (1) Add lights and increase their safety, (2) eliminate the crawl under, (3) provide access to all track and scenery, (4) use a new track design, and (5) use of new scenery and construction techniques.
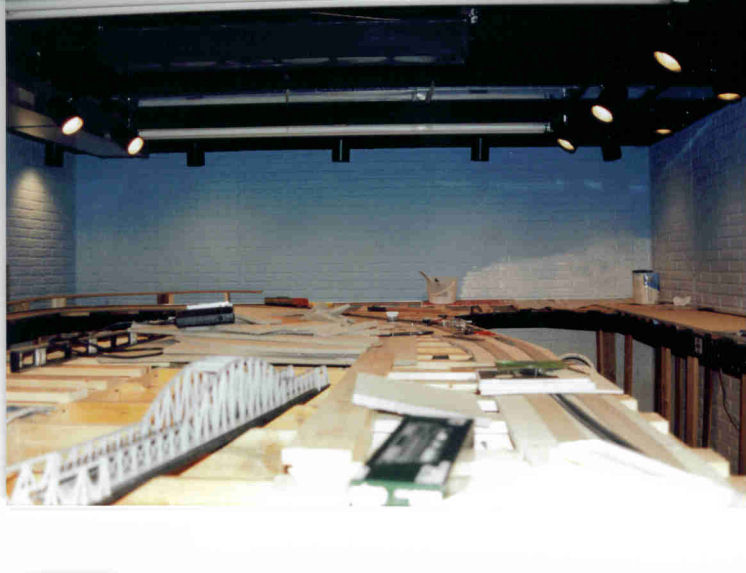
Photo #3 January, 2003 - New bench work is being built.
The track design had to allow for both the travel to Zacharyville and the return to Tylerville. Now that all these requirements were placed in the plan, I was ready to start the rebuilding of Zacharyville.
I hired our neighbor, Roger Schmit, to install and wire two circuits of track lighting. He used 60 watt incandescent bulbs placed in thirty canisters positioned to get the best effect when operating the layout. I kept the three sets of 8 foot fluorescent tubes to light the room when I was working on the layout. After a few evenings working under the new lights, I found the incandescent bulbs to give off more heat than I wanted, but they gave better light for the scenery.
Next, Tri-City Model Railroad Association member Howard Junker, who has trackage rights on the D & EM RR, and I started to build the bench work. Howard had the tools needed to build the bench work strong and level. We started by building the bench work on the south wall using the existing 1 by 4's attached to the concrete wall. Using as much of the old wood as possible, 1 by 4's were used for the legs and side supports. Drywall screws were used to attach the wood. This was so much easier than nailing, as I had done 20 years ago. On top of the frame, 1 by 2's were screwed down every six inches to give the support for the Homasote. The width of this bench work was only 10 inches from the wall, but had plenty of room for 3 tracks. We tested the strength of the bench work and checked to make sure it was level. We then proceeded to the west wall. We used the same procedure using 1 x 4's, but the width of this portion of the frame work was increased to 3 feet. After checking to make sure all was level we moved on to the north wall where the Zacharyville Yards would be located, a width of 20 inches. This gave more than enough area for building the yards and several small industries.
Next came the building of the 6 foot wide peninsula. Attached to the west end of the bench work, the peninsula's length was 18 feet. This part of the bench work gave the trains distance in their run, plus the needed space to lay the return track back to Tylerville. The last section of the peninsula was done by my son Mark and I.
This project gave us some time to work together on the layout before he traveled back to his home in Arizona. (My younger son Chad, who is a civil engineer, had helped me build the bench work for Josie Junction several years earlier). Holes were drilled in the cross boards of the bench work, 1/2 inch for the loco net wire going to the many UP-3 and UP-5 panels placed in the fascia of the bench work, and 1/4 inch holes for the stringing of #14 gauge stranded wire that would be used for the track power. I pulled the wires through the holes from above the bench work instead of waiting until the Homasote was attached. Finally, Homasote was screwed down to the new bench work where the roadbed and track would be laid. Open grid bench work was utilized to allow for varying depths of scenery. The bench work was tested and found to be strong and level, thus ready for installation of roadbed and track.
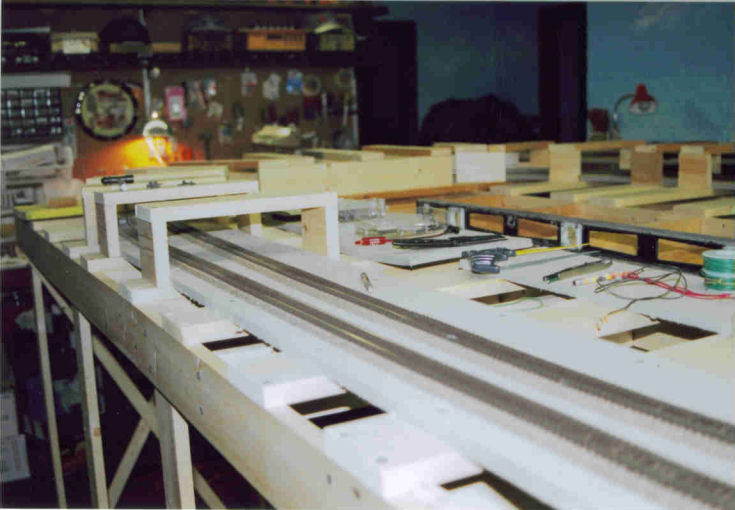
Photo #4 February, 2003 - New bench work is being built
I had used code 100 Atlas flexible track and turnouts for many years on different layouts. These Atlas products have been very reliable over time, but I wanted to try different track and turnouts for the new layout. I chose code 83 Atlas flex track because it is more prototypical than code 100 and chose code 75 Peco Electrofrog turnouts because of their realistic profile, spring-loaded points for positive electrical pickup and power-routing. All of my previous railroad layouts were built with cork roadbed with great results. Thus I felt there was no reason to change to alternative material for the roadbed.
My plan for laying roadbed and track was very simple. First I installed perimeter mainline track connected to the adjacent rooms so I could run trains during the rest of the construction. I felt it was best to install several feet of roadbed and then lay the track. The track design was marked on the Homasote with pencil, using a yardstick to draw the greatest possible radius of each curve the cork roadbed was cut and installed on the Homasote using small track nails. The roadbed was used everywhere on the layout except in the yard areas as the roadbed was needed under all mainline track for drainage, which was not needed in the yards.
Track was laid using small nails spiked outside of the rails, thus keeping the pressure off the middle of the ties. Track sections were soldered together to give a smooth curve and turnouts were spiked in appropriate positions. Using manual turnouts made the installation simple and gave the brakeman on each train a real job.
Using a stationary decoder, I installed four Peco switch motors on turnouts that were difficult to throw manually. Zacharyville Yard was designed by club member Randy Krause, who used a three-way Peco turnout to give some excitement to the track plan.
I soldered #20 gauge stranded feeder wires to each 3 foot section of track and attached them to the #14 gauge wire under the bench work. This eliminated the need for rail joiners to carry electricity. Periodically, I tested the roadbed and track by running a switch engine to make sure everything was operating smoothly. In two weeks time I had laid a single mainline track around the perimeter of Zacharyville, connecting it with the other rooms and making it possible to run trains over the entire layout. I then built the grades and laid and wired the roadbed and track for all the bench work in Zacharyville.
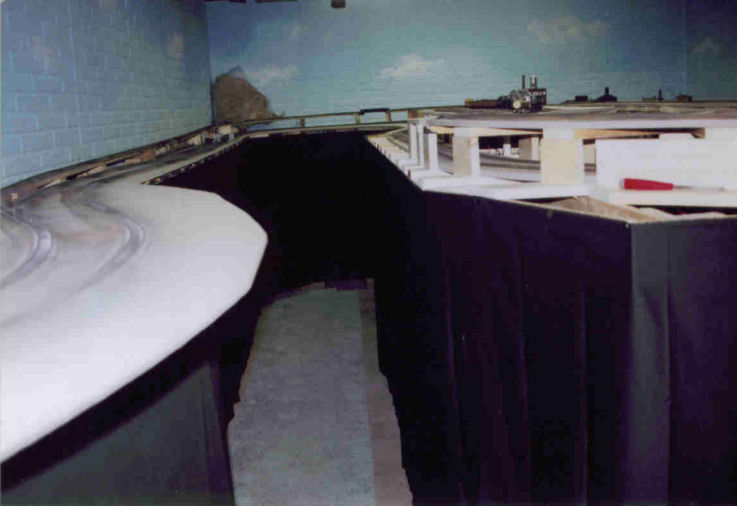
Photo #5 Roadbed and track is being put down.
It did not take me long to learn about electrical shorts when using DCC. When a short took place, the entire layout was shut down. To eliminate this problem Howard and I divided the layout into four sections and installed the Power Shield by Tony's Train Exchange giving us uninterrupted operating because only the section where the short took place would shut down.
Trains ran over the new track many times before weathering and ballasting was added. I used Lloyd Larson's method to weather the track, working about an 8 foot section at a time. Flat black was sprayed on the track, followed by light earth, and finally battleship gray. I did the weathering by holding a large section of cardboard behind the track; I wore a mask and left the basement after about 30 minutes of work. I cleaned paint off the railhead and again tested the track for smooth operation.
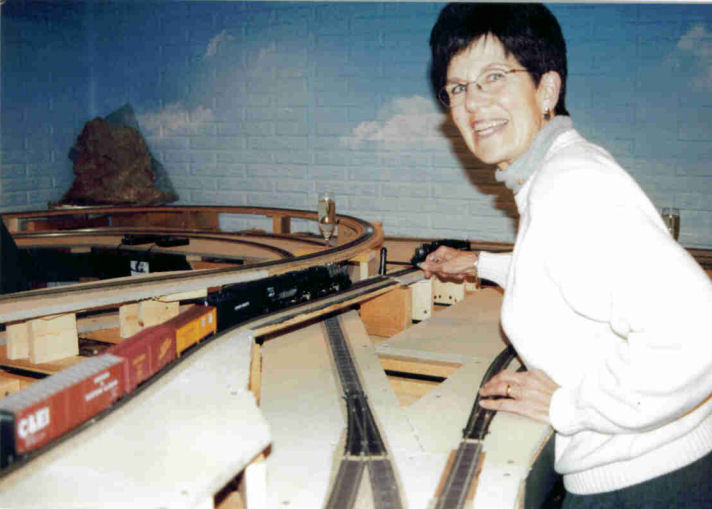
Photo #6 February, 2003 - Dianne Mullins is driving a golden
spike for the mainline.
The mixed freight train has Dianne's Trix Big
Boy as power.
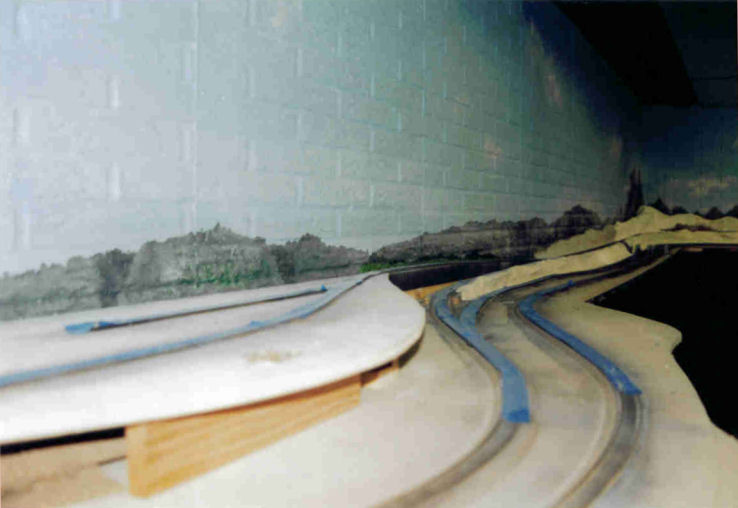
Photo #7 Painting the background and the start of scenery.
Next, I placed all of the gray ballast I had on hand in a large container, put in some brown and mixed it altogether. I used this mixture for the mainline and used fine cinders for the sidings and yard trackage. The mainline ballast was sprinkled in position; a mixture of water and detergent was sprayed on the ballast; and finally a mixture of 50/50 water and matte medium was applied to bond the ballast. I used the same procedure for the sidings and yard track except I used a mixture of alcohol and detergent to wet the ballast. This method gave the yard ties a weathered look.
Scenery construction was the next project, since the layout looked so bare. I painted the walls the color sky blue and Dianne added the clouds using stencils and spray paint. We took the same precautions of using masks and gloves as I had in weathering the track.
Standard techniques were used for most of the scenery work. Using rubber molds and rock castings was a new method for me to build mountains. Lloyd allowed me to use a variety of his rubber molds. I mixed Hydrocal and water into a soupy texture and poured it into the rubber molds. After several hours of drying, the molds were removed and the Hydrocal had the look of real rocks. I built the mountain framework using 1 by 4's covered with screen wire. I laid plaster cloth over the screen wire. When dried, this gave a strong base to build the mountains using the rock castings. The rock castings were held in place using wallboard joint compound. By using the same rock casting in different positions, it could be used many times in the same area. Dianne stained the rocks with oil paint thinned with turpentine.
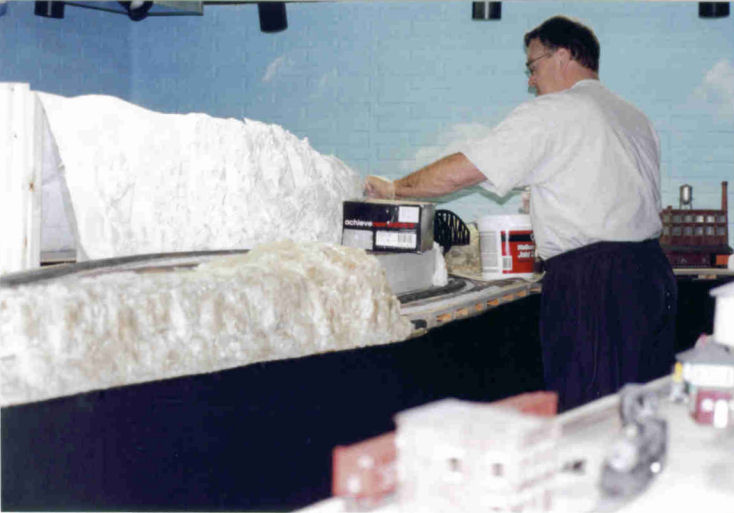
Photo #8 Earl building a mountain
Club member Jim Wells, who also has trackage rights on the D & EM RR, is an important contributor in solving the problems that occur on layouts this size.
Operations have become an important part of the railroad and are being done by members of the Platte Valley Division of the NMRA. Some of the members are involved in the Achievement Program of the NMRA and are working toward the Chief Dispatcher certificate. The rebuilding of Zacharyville has made it possible to operate the layout in prototypical fashion.
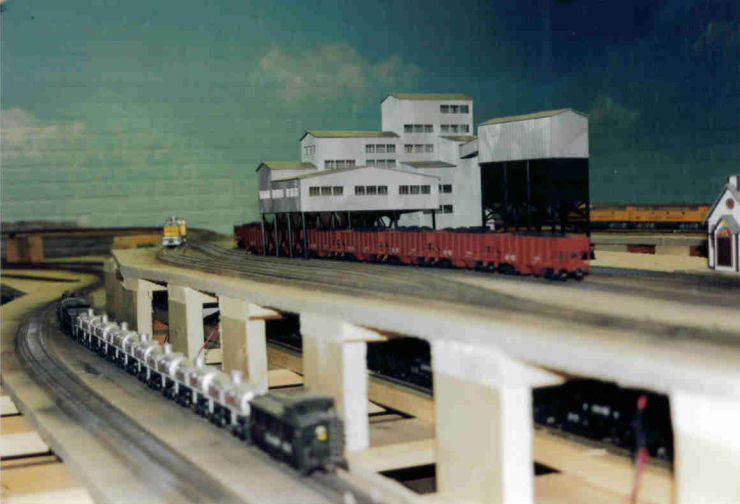
Photo #9 Wells Mining Company (structures are added)
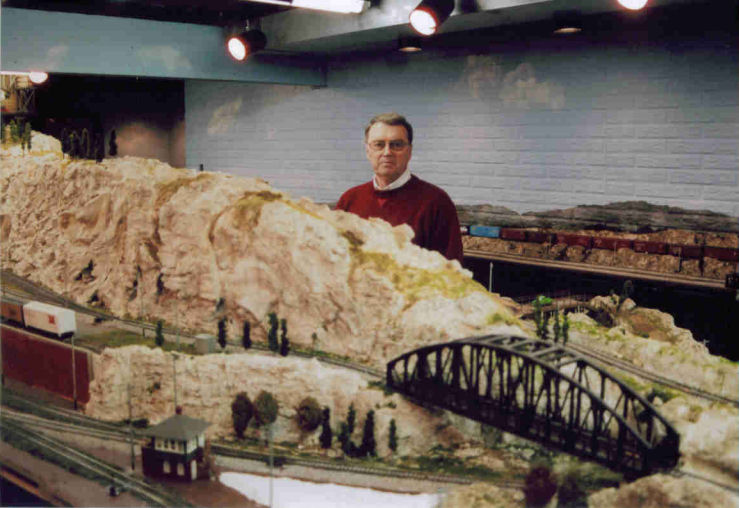
Photo #10 Earl and finished mountain.
Improvements in the railroad will be on going, and, of course, the scenery will never be finished. The reasons for the rebuilding of Zacharyville have been met. Even though the tearing down of Zacharyville was difficult to do after operating it for 22 years, the improvements with the new layout have certainly been worth the sacrifice.
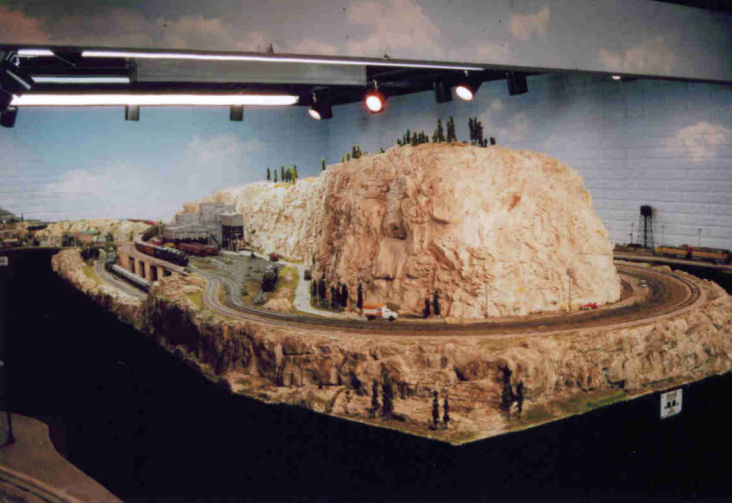
Photo #11 Zacharyville as of September, 2005
Earl and Dianne Mullins operate the HO scale D & EM Railroad. They live in Hastings , Nebraska . Earl is a retired teacher and has been a model railroader since he received an American Flyer train set for Christmas in 1951. He is an active member of the NMRA and the Platte Valley Division and is currently president of the Tri-City Model Railroad Association.
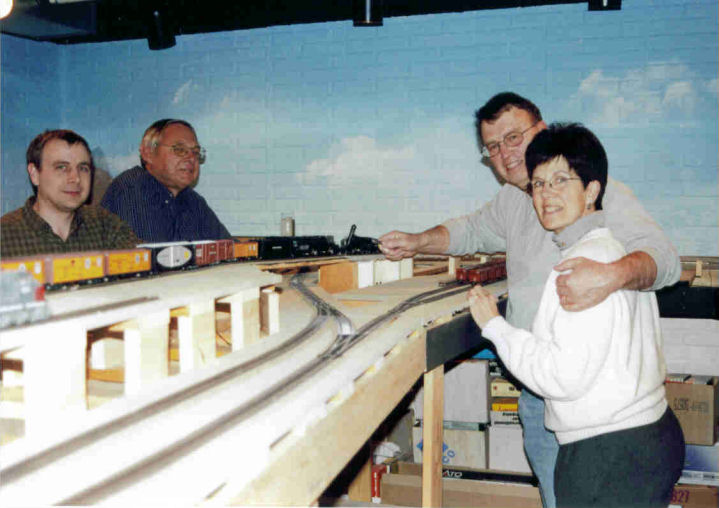
Photo #12 February, 2003 - Left to right: Jim Wells, Howard Junker, Earl Mullins, and Dianne Mullins. Earl is driving the golden spike for the mainline. The mixed freight train has UP #3985 as power.
( 26.535 Points for Author for article and photos. Marty Vaughn )